Friday, November 13, 2009

Importing your blog from AOL Journals to Blogger

How to Import your blog from AOL Journals to Blogger

Importing your blog from AOL Journals to Blogger is a fairly simple process. When you import your AOL Journal to Blogger, your posts, comments, photos and videos will be preserved. Blogger is a free blogging service from Google that makes it easy to share your thoughts with friends and the world. Blogger supports most of the features you've come to expect from AOL Journals and is easy to get started. You can learn more about our features here, or view our getting started guide here. If you're ready to get started, please follow the steps immediately below. If you still have questions, you can visit our Blogger Help Group or see if your question is answered in the Frequently Asked Questions. If you've already tried importing your blog to Blogger but encountered an error, please see our troubleshooting tips.

  • Step 1: Sign in with the Google Account you would like associated with your blog at this page. If you don't have a Google Account, you can make one here.
  • Step 2: Once you've signed in with your Google Account, you'll be asked to enter your AOL Journal URL (e.g. journals.aol.com/screenname/title-of-blog) and click "continue."
  • Step 3: On the next page you'll be asked to sign in with your AOL OpenID screen name or email address.
  • Step 4: The import process will then begin and may take a few minutes to complete.
  • Step 5: After your blog finishes importing, you'll be asked to choose a title for your new Blogger blog as well as a new address.
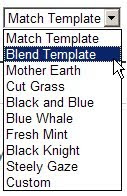
  • Step 6: Once you've chosen a new title and address, you can then select one of our blog templates.
  • Step 7: You have now successfully imported your blog to Blogger! Click "view your imported posts" to visit your blog at its new address.

Frequently Asked Questions

Question: I don't want to move my blog to Blogger, how can I move it to another service?

Answer: You certainly may choose to migrate to another blogging service. Since Journals has no built-in exporting function, you'll need to find a blogging service that has the ability to import from AOL Journals. Blogger.com was chosen by AOL for many reasons, first and foremost reason was our willingness to build such an import tool that would help you build a new blog with most if not all of your postings and comments, as well as pictures intact and ready to publish.


Question: My blog won't import, or my blog is missing information after my import to Blogger was completed. What do I do next?

Answer: Please visit our Blogger Help Group to get assistance with any problems you may have encountered during the migration process.


Question: Will my journal live in two place after I migrate my blogs to Blogger until Oct 31st?

Answer: Yes, your blog will reside on the Journals site and Blogger until AOL performs the Journals shutdown on 31 October.


Question: How secure is the AOL Journals to Blogger.com migration? I don't want my AOL user name or password made available to a third party.

Answer: You can rest assured your AOL data will remain secure as all user name and password activities will be handled securely and only as instructed by AOL on an AOL OpenID Sign In page.


Question: I have a private AOL Journal. How will this be handled in the process of migrating to Blogger?

Answer: As you proceed through the Blogger migration process, Blogger will sense you are attempting to migrate a private journal and will instruct you to log into your private Journal to make it temporarily public. Once you have done this and then finish the migration to Blogger, you'll be able to return your Journal to private. In addition, you can mark your Blogger blog as private. If you want to make your Blogger blog private or limit who can view it, read our help article to learn how.

Troubleshooting

I started importing my blog, but it failed midway or only partially worked.
If this happens and you see a partially imported blog in your Blogger dashboard, then you can delete this blog and re-import it by going here.

My import fails during the final "publish posts now" process.
Refreshing the page will usually fix this.

After I imported my blog I have the option to "publish all posts now" or "edit posts before importing." When I choose "edit posts before importing," by default I only see 50 posts and the option to check "all." However, this only publishes the 50 posts I imported.
You may need to repeat this process until all posts are published. On the "Edit posts" page you can choose to view up to 300 posts at a time and publish up to 300 posts at once.

I'm getting the error message "we cannot find your journal."

There are a few reasons why this might happen:
  • Your AOL Journal is still private. You need to make it temporarily public in order to complete the migration process, after which you can make your AOL Journal (as well as your new Blogger blog) private again.
  • You entered the URL of a non-existent journal. Make sure you have entered the exact address of your current AOL Journal.
  • The journal you tried to import has been deleted in AOL and doesn't exist anymore.
  • A disruption in network service occurred during the importation of your blog.

Monday, November 9, 2009

Google launching free videoconferencing

Google is all set to strengthen its voice and video chat capabilities. The voice and video chat feature in the company's the email service, Gmail, is currently limited to one-to-one communication, however, Google wants to broaden this capability to more than two participants.

The Google Apps product manager Rishi Chandra told SFGate that Google is set to roll out its first update in a long line of updates that will include multi-user video conferencing.

Chandra told the web site, “This (current Gmail capability) is the first step in a much broader set of features we hope to roll out over the next six to 12 months around video (and voice) chat capabilities.” He added, "It’s a great opportunity for us to push that space along."

Google acquired Web and video conferencing software in 2007 from Swedish company Marratech.

Source: http://news.google.com

Tuesday, November 3, 2009

All about the Blogger 'Monetize' tab


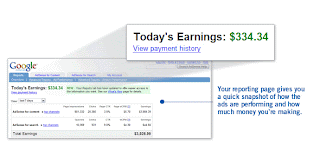
The Monetize tab in Blogger makes it easy to enable AdSense ads on your blog. Once enabled, Blogger will retrieve your AdSense earnings data directly from AdSense so you do not need to go to AdSense to get basic earnings information.

AdSense Reports
Once you start generating AdSense impressions, you will begin earning money when people click on ads that show on your site.

The earnings report (visible when you click on the Monetize link from your Dashboard, or the Monetize tab when viewing your blog while logged into Blogger) includes a drop-down bar with Today, Yesterday, Last 7 Days, This Month, Last Month, and All time.

Selecting an option will retrieve the relevant report directly from AdSense.

All time
If you are already an AdSense user, you will notice that Blogger created a new channel (with the URL of your blog) in your account. If you have had AdSense ads on your blog before using Blogger’s AdSense integration to insert ads into your blog, it is important to note that All time will retrieve data only from the time you connected Blogger to your AdSense account.

This in no way affects your overall AdSense reporting, available directly from AdSense.

Terminology
The AdSense report visible from the Monetize tab contains basic information about how many ads have run on your blog, how many clicks were generated, and how much revenue you have earned. Each term in the report is defined below:

Page impression: A page impression is generated every time a user views a page displaying Google ads. We will count one page impression regardless of the number of ads displayed on that page. For example, if you have a page displaying three ad units and it is viewed twice, you will generate two page impressions and six ad unit impressions.
Clicks: # The number of times an ad was clicked on in the given reporting period.
Page CTR (Clickthrough Rate): The number of ad clicks divided by the number of impressions for the page of ads that appears when a link unit is clicked.
Page eCPM (Effective Cost Per Thousand Impressions): Calculated by dividing earnings by number of page impressions and multiplying. This makes it easier to compare multiple sites to see which are performing better.
Earnings: Total revenue earned to date. More detail about earnings is available in the AdSense Help Center.

source: www.google.com/support

How to put AdSense in your blog's sidebar

Note: This article assumes you are using a classic template. For Layouts-enabled blogs, you can simply add a new AdSense page element to your sidebar, or drag an existing element to the desired location.

If you're new to AdSense and not too familiar with making modifications to your blog's template, you can follow these instructions for placing AdSense code in your blog's sidebar (using the Minima template as an example).

Assuming you have already signed up and been approved for a Google AdSense account, you should be able to log in here. Once you're signed in, click the AdSense Settings tab near the top of the page. To cut right to the chase, focus on these steps:

1. Choose Your Ad Layout - To fit ads in your sidebar, it's best to choose one of the following ad layouts.

Button (125x125)
Skyscraper (120x600)
Wide Skyscraper (160 x 600)
Vertical Banner (120 x 240)
Small Rectangle (180x150)

2. Choose a color palette - They are very cleverly named but it's really just a matter of your preference.

3. Copy your AdSense code - At the bottom of the page, there's a box with code in it. Highlight all of that code and copy it.

4. Paste the code somewhere - Notepad or Text Edit or something like that is a good place for now.

5. Go to Blogger.com and sign in - Choose the blog you want to put ads on and click the template tab.

6. This is less of a step and more of a precaution - Copy your entire Blogger template and save it in Notepad or Text Edit just in case.

7. Find the place in your template that says this; you might have to scroll down pretty far:

How do I show ads between my posts?

If you want to show ads between your posts but chose not to do it while initially signing up for AdSense, first go to your Template | Page Elements tab. Then, in the "Blog Posts" section, click on "Edit". A pop-up window will appear with options to configure your blog posts. Check the box next to "Show Ads Between Posts". (Note: You must be signed up for AdSense before you can check this box.)


Once you check this box you'll see the configuration options for your ads. You can then select how often you would like ads to be shown after your posts.


For example, if you want ads to be displayed after every post, select "1" from the drop-down menu. (Please note that AdSense policies limits you to a total of 3 ad units per page and Blogger will automatically prevent you from going over this limit.) You can then select your ad format and colors. Once you have finished configuring your ads, click on the orange "Save Changes" button in the bottom right corner.

Monday, November 2, 2009

Google Voice has more than 1.4M users

Google Voice has more than 1.4 million users, and of those, 570,000, or 40 percent, use the service every day, according to a confidential part of a letter Google sent to the FCC, which was disclosed by BusinessWeek. Additionally, according to the letter, Google may expand the service internationally. The figures on the growth and popularity of the service give some greater context to a fierce debate over the service between Google and AT&T.

Last week, Google sent a letter to the FCC about Google Voice in response to a series of questions that the FCC had posed to Google about the nature of the service. Several portions of the letter were redacted and marked as confidential. A formatting error led to the accidental publication of the confidential material. The FCC has since replaced Google's response with the version that has the material redacted.

"We had intended to keep sensitive information regarding our partners and the number of Google Voice users confidential," Google said in a statement to BusinessWeek. "Unfortunately, the PDF submitted to the FCC was formatted improperly." The confidential portions of the letter also state that Google has inked contracts with a number of "international service providers for inputs to Google Voice," but that the services had not yet been launched.

Until now the extent of Google Voice's popularity wasn't known. The service started in 2005 and remains invitation-only, yet has been the subject of an intense debate in recent weeks. AT&T has argued that the service is improperly blocking calls to rural areas and should be regulated like a traditional telephone service. Google has countered that it blocks calls to fewer than 100 specific phone numbers due to what Google said were high-cost "traffic pumping schemes." Google also said that the service not be regulated like a traditional telephone service because it is a "Web-based software application" that is "completely distinct from the user's telephone access lines/services."

In other Google news, Andy Rubin, director of mobile platforms at Google, quashed a rumor that the company was planning to release its own phone based on its Android platform. In October, TheStreet.com reported that Google was planning to release its own branded, unlocked, Android-based phone this year. Rubin said the company was not going to "compete with its customers."

"We're not making hardware," Rubin told CNET in an interview. "We're enabling other people to build hardware."

Source: www.fiercewireless.com

Friday, October 30, 2009

What is Google Adsense

AdSense is an ad serving application run by Google Inc. Website owners can enroll in this program to enable text, image, and more recently, video advertisements on their websites. These advertisements are administered by Google and generate revenue on either a per-click or per-impression basis. Google beta tested a cost-per-action service, but discontinued it in October 2008 in favor of a DoubleClick offering .

What is Google Adsense


Google AdSense is the program that can give you advertising revenue from each page on your website—with a minimal investment in time and no additional resources.

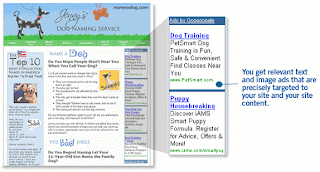
AdSense delivers relevant text and image ads that are precisely targeted to your site and your site content. And when you add a Google search box to your site, AdSense delivers relevant text ads that are targeted to the Google search results pages generated by your visitors’ search request.

Earn more revenue

You can maximize your revenue potential by displaying Google ads on your website. Google puts relevant CPC (cost-per-click) and CPM (cost per thousand impressions) ads through the same auction, and lets them compete against one another. The auction takes place instantaneously, and, when it’s over, AdSense automatically displays the text or image ad(s) that will generate the maximum revenue for a page -- and the maximum revenue for you.

Get started in minutes

Becoming an AdSense publisher is simple. All it takes is a single online application. Once you're approved, AdSense takes only minutes to set-up. Just copy and paste a block of HTML and targeted ads start showing up on your website.

Access thousands of advertisers

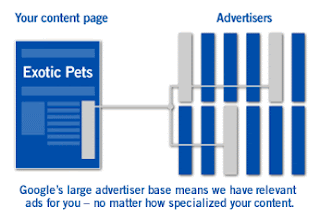
With Google's extensive advertiser base, we have ads for all categories of businesses-and for practically all types of content, no matter how broad or specialized. And since Google provides the ads, you have no advertiser relationships to maintain.

The AdSense program represents advertisers ranging from large global brands to small and local companies. Ads are also targeted by geography, so global businesses can display local advertising with no additional effort. And you can use AdSense in many languages.

Google grasps the meaning of your content

AdSense can deliver relevant ads because Google understands the meaning of a web page. We've refined our technology, and it keeps getting smarter all the time. For example, words can have several different meanings, depending on context. Google technology grasps these distinctions, so you get more targeted ads


Make extra money with a Google search box


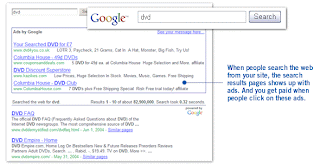
Place a Google search box on your site, and you can start monetizing the results from web searches. Not only does this keep your users on your website longer—since they can search from where they are—it takes just minutes to implement. And you pay nothing to participate.


Show only appropriate ads
Google's ad review process ensures that the ads you serve are not only family-friendly, but also comply with our strict editorial guidelines. We combine sensitive language filters, your input, and a team of linguists with good hard common sense to automatically filter out ads that may be inappropriate for your content. What's more, you can block competitive ads and choose your own default ads. It's your show from start to finish.


Competitive Filter
Enables you to filter out specific competitors or specific advertisers
Contextual Filter
Eliminate delivery of ads that would be inappropriate to serve on pages
Editorial Review
All Google ads are reviewed and approved before being served on your pages
filters keep out inappropriate
and competitive ads.
Customizable default ads
In the unlikely event that Google is unable to serve targeted ads on your page, we provide the option to display a default ad of your choice


Customize AdSense for your site


You can customize the appearance of ads, choosing from a wide range of colors and templates. Ditto with your search results page. Your reports are customizable, too. Flexible reporting tools let you group your pages in any way you want so you can view your results by URL, domain, ad type, category and more to learn where your earnings are coming from.

Source: Google.com

How do I put AdSense on my blog (using a classic template)?

The Quick Answer

* Go to the Template | AdSense tab and sign up for AdSense, if necessary.
* Select the size and color of your ads.
* You'll see a preview of your blog as you make changes.

Note: This article assumes you are using a classic template. On a Layouts-enabled blog, just add a new page element and select the AdSense option.

Adding AdSense to your blog is easy. Go to the Template tab in Blogger and you'll see an "AdSense ads" tab below it:


If you don't have an AdSense account already, you can sign up for it right here within Blogger. Just enter a valid email address, choose a password, fill in some contact information (so you can get paid!) and then Blogger will register your account for you right away. If you do have an account already, just use the "sign in" link instead.


Once you've completed the sign-up form, or logged in to an existing account, you'll see a special preview version of your template, showing your blog as it will look with your new ads:


Using the menus above the preview, you can easily change the size, shape, and color of your ads, without ever needing to edit the code directly. The color menu has some preset color schemes, but also some flexible options that try to match, contrast, or blend with whatever template you happen to be using. Try them all out and see which setting works best.


Once you've decided how you'd like it to look, just save the changes and republish your blog. Then go check your email.

While you were deciding on layouts and colors, you probably received a confirmation email from AdSense. Find that email and click on the link it gives you to confirm your email address. Be sure to read the rest of the confirmation email as well, since it will contain other information on finishing the registration and approval process. Until your email address is confirmed and your AdSense application is approved, your ads will only show public service announcements (PSAs) rather than targeted ads. Since you don't get revenue from PSAs, you'll want to be sure to do this soon, so the AdSense bot can crawl your site and determine appropriate ads to show.

And now you're done! Congratulations -- you've got AdSense!

Notes:

* There may be a bit of a delay before the AdSense bot gets to your site and you start getting targeted ads, though that should happen within 48 hours. Just be patient and it will get there in time.
* This feature does not currently provide a way of moving the ads, though the default location used is one that tends to provide the best results. If you would like to move it elsewhere, such as to your sidebar, you will need to edit your template code directly. See How to put AdSense in your blog's sidebar for more details.
* You can see how well your ads are doing by checking the 'Reports' tab on the AdSense website to look at your Ad performance. Keep in mind that reports appear an hour or so after a change has been made (and may sometimes be delayed up to 24 hours).
* To change your payment information, or other account details after you've signed up you'll need to go to the main AdSense site and log in to your account there.

How do I put AdSense on my blog (using Layouts)?

First of all, choose the blog that you want to put AdSense on, and go to the Layout | Monetize tab. You can get there by clicking the Layout link on the dashboard, or clicking the Template tab from the posting or settings page of the blog.

Once you're there, choose one of the three options to display your ads: in your sidebar and posts, just in your sidebar, or just below your posts.

The next page asks you to either sign up for a new AdSense account or use an existing one. Once you've signed in or created or account, you'll get a confirmation screen. If for any reason you need to switch to using a different AdSense account, click the switch AdSense accounts

About AdSense for Your Blog

Blogger provides a simple way for you to make money with your blog. AdSense is Google's content-targeted advertising program. This means that you don't select keywords or categories for your ads. Instead, Google's servers determine what your posts are about and display the most relevant ads to your readers. So, if you blog about baseball, there might be ads for Major League Baseball memorabilia next to your post. If you blog about painting, there might be ads for art supplies.

Blogger requests access to your AdSense account in order to allow us to create and place ad code on your page through our layouts and template tools. As part of this process, you may notice that Blogger is receiving "0%" of your AdSense earnings - this means that you will receive the same amount for clicks or impressions as you would creating the ad code from your AdSense account. To view any partners that have requested access to your AdSense account, and their associated revenue shares, please log in to your AdSense account, click the "My Account" tab, and choose the "Account Access" sub-tab. If you see a "grant access" link next to blogger.com, you must click this link in order to create ads with Blogger tools.
Putting AdSense on Your Blog

This integration between AdSense and Blogger is intended to make it easier for you to get up and running with AdSense on your blog. To place AdSense on your blog quickly and easily, see our help articles here:

* How do I put AdSense on my blog (using Layouts)?
* How do I put AdSense on my blog (using a classic template)?

To take full advantage of other AdSense options and settings, you can sign in to the AdSense site and have a look around. That's where you can see how much money your ads are earning and all that good stuff.

See Also: What Is AdSense?

Friday, October 23, 2009

Google adds more personalization to Reader

Google has added new personalization features to Googel Reader, its RSS feed aggregator, the company wrote in a blog post Thursday.

One new feature is dubbed Popular Items. Using algorithms, Reader will "find top-rising images, videos and pages from anywhere (not just your subscriptions)." From there, the app will lump all those pieces in the new Popular Items section. Based on a user's subscriptions and what someone is reading, Reader orders those stories by what it thinks a person likes best.

Reader's recommendations have been moved to the app's Explore section. Google also renamed it Recommended Sources. Like before, that feature will employ the user's Reader Trends and Web History to find a list of feeds he or she might like.

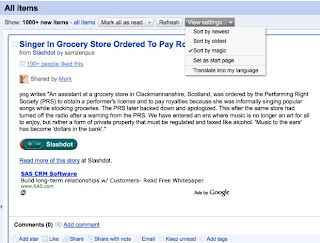
To make it easier for users to find the information they're most likely to care about, all Reader feeds now feature a sort option called Magic. According to Google, Magic "reorders items in the feed based on your personal usage, and overall activity in Reader, instead of default chronological order." Google said that the ranking is tailored to the user. The more the user clicks the "like" and "share" buttons on stories, the better the Magic sort will be.

Here is the Magic setting in action:


Source: http://news.cnet.com

Thursday, September 24, 2009

Google Orkut Data currently not available

The message Data currently not available appears when we're not able to display one part of your homepage, profile, or a community. We show this message to you instead of giving a Bad, bad server error so you can still use the other features on the page.

Please be assured that we haven't lost any of your friends or communities and the missing sections should re-appear next time you visit this page.

Browser requirements for Google Orkut

For the best experience, please access orkut via one of the following fully supported browsers:

* Microsoft Internet Explorer (IE) version 6 or later via PC (download)
*We also recommend the IE6 Service Pack 1, which has some important security patches.
* Mozilla Firefox version 1.5 or later (download)

You can also access orkut via the following browsers, although the UI quality may not be as high:

* Apple Safari 2.04 or later (download)
* Netscape Navigator 7.2 or later (download)
* Opera 9.2 or later (download)

Note: JavaScript and cookies must be enabled on all browsers.

Google Orkut Invitation failed

If you're trying to register for a new orkut profile and you're getting an error that says Invitation failed, please note that you can also join orkut by visiting www.orkut.com and clicking the JOIN NOW link.

If you have a Google Account, just enter your account information and click Sign in. You'll be prompted to create your orkut profile.

If you don't have a Google Account, click the Create a Google Account to access orkut link and follow the instructions. Don't forget your username and password; you'll need them to sign in to orkut whenever you visit.

Google Orkut Page not loading

If your page is not appearing correctly, here are a few things you can try:

* Clear your cache, then try accessing your profile again.
* Make sure that cookies are enabled in your browser.
* Try accessing your account from another browser.
* Try restarting your computer.

If your friends are having difficulty seeing an updated version of your profile name or photo, please forward these instructions.

Reporting a problem with Google Orkut

If you discovered a bug on orkut.com, we'd like to hear about it. But first, check out our Known Issues page to see if we're already working to fix it.

We'll review your report but keep in mind that we'll only contact you if we need more information. Thanks in advance for helping us improve.

Prevent viruses and spyware on Google Orkut

Due to orkut.com's open nature, we realize that users can unwillingly infect their computers with viruses, spyware, adware, and other unwanted junk. This can result in strange behavior, such as sending unintended scraps to friends. To help prevent this from happening, we recommend the following safe practices:

* Don't click on any link you suspect to be malicious, even if sent by someone you trust.
* Scan your computer regularly for viruses, spyware and adware.
* Never run any script while logged into orkut.com, no matter what it claims to do.
* Make sure you supply your sign-in information only on www.orkut.com.
* Change your Google Account password regularly and keep it secret.

If you suspect your computer's security has been compromised by a virus, spyware or adware, you can download free applications to resolve the situation. We highly recommend Norton's AntiVirus software, available as part of the Google Pack. In addition, we recommend the following anti-spyware programs:

* Spybot - http://security.kolla.de/index.php?lang=en&page=download
* CWShredder - http://www.spywareinfo.com/~merijn/files/cwshredder.zip
* Ad-Aware - http://www.lavasoft.de/support/download

If you think someone is using your account without your permission, read about impersonation on orkut.

Additionally, we'll never send you spam emails asking you to download anything or to send us personal information, such as your password or bank account information. orkut.com is a free service, and it will remain safe with your help.

Unable to perform actions on Google Orkut

As part of our effort to curb spam and viruses on our site, orkut has a limit on how many actions (scraps, messages, friend requests, testimonials, topics, events) you can perform in a certain amount of time. After you perform one of these actions many times within a day, you'll see a word verification box for subsequent attempts, as long as you haven't yet reached the limit. If you try to exceed our current limits, you'll see this error message: "You are temporarily unable to perform this action. Try again later."

If you encounter the word verification box or the temporary block when you're performing one of these actions for the first time in a 24-hour period, your computer may have been infected by a worm or virus. We encourage all orkut users to install the Google Pack and use it to run virus and spyware scans on your computer. You can also read more about preventing viruses and safeguarding your orkut profile.

Google Orkut 'Page not found' error

You may see an error message on orkut when trying to send or delete scraps quickly. This error is occurring to prevent automated systems from using orkut. You should be able to perform these actions again after waiting for a few hours. We appreciate your patience and help as we try to keep orkut safe for everyone!

Google Orkut Issues with hot-list, crush-list, and teasers

The add to hot-list, add to crush-list, and send teaser buttons are only visible if you've filled out the personal section of your profile.

Follow these steps to enable this feature in your profile:

1. Select Home in the blue bar at the top of the page.
2. Click edit profile under your photo.
3. Click the personal tab and enter any information you'd like to share.
4. Click update at the bottom of the page before exiting.

Problems contacting one Google Orkut member

If you're unable to send scraps, messages, friend requests, or testimonials to another orkut user, it's likely that this person has added you to the ignore list.

Here are the steps the other user should follow to remove you from the ignore list:

1. Visit your homepage and click lists on the sidebar.
2. Choose the ignore list tab.
3. lick remove next to the name of the person you'd like to remove from your ignore list.

If your friend is still having trouble receiving material from you, please ask them to visit our Help Center for information on how to remove a friend from the ignore list.

Blocking a Google orkut user

You can block another user from sending you scraps, messages, invitations, friend requests, and testimonials by adding that user to your ignore list. The ignore list is visible to you and other users won't know who's on your ignore list.

To ignore a user, visit their profile. Point the mouse to the more link in the left sidebar and click ignore user.

You can remove members from your ignore list by following these steps:

1. Visit your home page and click lists on the left sidebar.<.li>
2. Click the ignore-list tab.
3. Click delete next to the name of the person you'd like to remove from your ignore list.

Google Orkut Waiting to scrap

To help prevent scrapbook spam, we've implemented an automated system that requires members to wait for a few minutes before creating a fifth successive scrap for the same person. Don't worry. You'll be able to scribble in your friend's scrapbook again soon.

Google Orkut Missing scraps

If just a few of your scraps or testimonials seem to be missing, keep in mind that the authors of scraps and testimonials have the ability to delete them at any time.

Occasionally the number of scraps on your profile page is incorrect. This number doesn't change the actual content of your scrapbook. You can view all your scraps by visiting your scrapbook and browsing with the next and previous buttons.

Also, users sometimes claim to have hacked your account and deleted all your scraps. In most cases, this is merely a joke to make it appear that your scraps are gone when really the user has just added a scrap that causes several blank pages to appear in your scrapbook. You can always see your old scraps in your profile by clicking the next and last buttons on your scrapbook. Also, you may want to delete the hoax scrap.

We're always working to improve orkut for you, and fighting spam is one of our current projects. Please be aware that the number of scraps in your profile might decrease as a result of our recent spam cleansing efforts. We hope that you're as excited as we are to decrease the amount of spam on orkut.

One last thing: we know how important your scraps and testimonials are; however, we're unable to restore any deleted content in your profile.

Rich-content scraps in Google Orkut

If you're having problems with a rich-content scrap, read through the following errors and restrictions:

* If your scrap containing a Flash embed isn't appearing, the site you're trying to insert content from is blocked by orkut. You'll see the error message: This rich-content scrap wasn't posted.
* If only part of a scrap is showing, the content you're trying to add has been blocked by orkut. You might also be using a tag or code that isn't allowed. The rest of the scrap will appear normally.
* There's currently a 1024 character limit for scraps.
* You need to be friends with someone to send that person a rich-content scrap. The scrap tips box lists the options still available for scraps to people who aren't on your friends list.
* orkut accepts the following file formats for images: JPEG,GIF, PNG, or BMP.
* orkut converts new line characters into HTML '
' tags, which can break the look of pasted HTML


Legal/Removal information:

* Be sure that you have all the necessary legal rights to distribute any uploaded or embedded content, including the rights to any images, voices, or music being used. You're responsible for compliance with all applicable laws and regulations that govern your use of the content. orkut will remove scraps when notified of copyright violations.
* Scraps containing questionable content or third-party ads may be removed by the orkut team without advanced warning. All content posted on orkut needs to adhere to our Terms of Service.

Maps not appearing in Google Orkut

Reconfiguring the way your browser handles JavaScript may resolve this problem. If you're using Mac OS X or Windows with Mozilla Firefox 0.8+, Mozilla 1.4+, or Netscape 7.1+, just follow these steps:

1. Type about:config (without quotes) in the browser's address bar.
2. Type image (without quotes) in the Filter field.
3. Verify that dom.disable_image_src_set is set to FALSE.
4. Verify that network.image.imageBehavior is set to 0 (the default setting).

Please note that network.image.imageBehavior may appear as permissions.default.image for some browsers.

If you continue to experience difficulties, you may want to uninstall any programs or extensions that change the way your browser handles JavaScript. Other users have reported that these programs may affect one's ability to view the map display.

Difficulty uploading Google Orkut videos

If you're having difficulty making or uploading videos, please visit the YouTube Help Center for technical assistance.

Please note that these websites will also be directly handling any reports of abusive content and copyright issues.

Unable to view Google Orkut photos

If you're experiencing difficulty viewing images on orkut, check that you have images enabled in your browser.

To enable images in Microsoft Internet Explorer (IE) 6:

1. Open IE and click on the Tools menu.
2. Select Internet Options.
3. Click on the Advanced tab if it isn't already selected.
4. Under the heading Multimedia, check Show pictures.
5. Click OK to exit.

To enable images in Mozilla Firefox 1.5+:

1. Open Firefox and click the Tools menu.
2. Select Options.
3. Click the Content tab.
4. Make sure the box next to Load Images is checked.
5. Click OK.

It's also possible your browser settings are configured to block images from our site. To make sure images aren't blocked in Mozilla Firefox, please follow the instructions below:

1. Click Tools > Options > Content.
2. Click on the Exceptions button to the right of Load Images.
3. Make sure images3.orkut.com and www.orkut.com aren't listed as blocked.
4. If the status of one of these pages is set to Block, select the site and click the Remove site button at the bottom-left corner of the page.
5. Click Close.
6. Click OK to exit.

Problems uploading Google Orkut photos

Recently we've been battling a number of problems related to uploading photos on orkut. We apologize for the inconvenience this is causing and assure you that we're working to resolve these problems.

Please note that when swapping one photo for another, you may not see the updated image for 48 hours. We appreciate your patience as we work to improve orkut.

Unable to vote Google Orkut poll

You won't be able to participate in a poll if it is already closed for voting. Also, you can only vote if poll participation isn't restricted to members only.

Disabling Google Orkut community messaging

If you're a community owner and would like to prohibit users from sending messages to the entire community, please follow these steps:

1. Go to the community homepage.
2. Click the edit profile button under the community image.
3. Find the messaging section and select the option 'off - do not allow members to send messages.'
4. Click the update button.

Note: Community owners will always have the ability to send messages to their communities regardless of the setting.

Google Orkut Stretched display

This stretched display occurs when a scrap or testimonial in your profile contains a very long word with no spaces. orkut doesn't add line breaks to the middle of words or phrases, even really long ones such as "pneumonoultramicroscopicsilicovolcanoconiosis" or "heyyou'reprettycooltohangoutwith..!!geez,haveyouseenallthepeopleinherfriendslist?!"

Unfortunately, this means that your profile may appear stretched as we try to fit this very long word in one line.

To return your profile to normal, delete the scrap or testimonial that's causing the problem. If you don't mind the stretched appearance but can't find the post scrap or delete buttons while viewing your scrapbook, you can keep the scrap and scroll to the right to view these buttons.

Issues with Google Orkut karma ratings

Some users have reported that their karma ratings are incorrect. We're aware of this issue and we're looking into it.

Please know the karma ratings feature is only compatible with certain operating systems and web browsers. Information about specific operating systems and browsers is listed below.

Mac
When using a Mac computer, the karma feature is only compatible with the latest version of Safari. If you're using a Mac, download it now. (Safari 1.2 is only compatible with Mac OS X 10.3 or higher.)

Linux
Karma ratings will only work when using the Mozilla browser on Linux.

Windows
On Windows, karma ratings work on all browsers, except Opera.

Your birthday on Google Orkut

Your birthday on Google Orkut

You can restrict access to certain parts of your orkut profile, including your date of birth. If your friends can't see when your birthday is, it's probably because you've restricted access to it.

To change this setting, go to your homepage and click edit profile under your photo. You can set viewing permissions for all the fields that show a key icon, including your birthday and birth year. If you want your friends to be able to see your birthday, fill in the birth day field and then select friends from the key drop-down menu to the right. Don't forget to click update to save changes.

If you update your birthday settings, these changes will be reflected the next day.

Tip: You should also make sure that your friend's settings are configured to show birthday reminders on the homepage.

Google Orkut No visitors shown

No visitors shown

The number of profile views and list of recent visitors is refreshed once a day. If you've recently turned this feature off, you wont see a list of recent visitors immediately after you turn it back on. Your recent visitors will take up to one day to appear.

Google Orkut No visitors shown

Google Orkut No visitors shown

The number of profile views and list of recent visitors is refreshed once a day. If you've recently turned this feature off, you wont see a list of recent visitors immediately after you turn it back on. Your recent visitors will take up to one day to appear.

Google Orkut About friend requests

If you have more than 10 friend requests, you will only see the first 10 at the top of your homepage with the message, you have more friends to consider, please accept or decline the ones shown.

As you accept or decline friends, the remaining friend requests will appear at the bottom of the list until you have confirmed all friend requests.

Reactivate deleted Google Orkut profile

If you receive an error message that 'This account has been deleted and is no longer available,' it means you've deleted your orkut profile (or somebody with access to your account has deleted it).

It isn't possible to reactivate a deleted orkut profile; however, you can create a new one. Note that we can't transfer or restore deleted scraps or other content.

You can create a new orkut profile by visiting www.orkut.com and clicking the JOIN NOW link.

If you have a Google Account, just enter your account information and click Sign in. You'll be prompted to create your orkut profile.

If you'd like to create a different Google Account, click the Create a Google Account to access orkut link and follow the instructions.

Problems with Google Orkut search

We realize that some users are having trouble finding certain profiles or communities in the orkut search results. Here are a few things to keep in mind:

* orkut search can't detect special characters such as accent marks (`).
* Once a profile or community has been created, it takes several days for our search results to be updated, so you may have to wait for a while before it appears in search results.

When searching for a community or a profile, try clicking the option to show all languages. We're working to improve our language filters and we appreciate your patience.

Change Google Orkut email settings

You can have orkut notifications sent to a different email address by changing the primary email address in your profile. Please note that changing your orkut email address will not change your orkut login.

To change your email address in orkut, follow these steps:

1. Click edit profile below your picture.
2. Click the contact tab.
3. Click edit below your primary email address.
4. Enter your new primary email address and click the update button.
5. A verification email will be sent to your new primary email account. To complete the change, please click on the link in that email.

*Make sure you include all of your email addresses in the secondary email fields to ensure that friend requests sent to your alternate accounts reach you. Don't worry, these additional email addresses won't be visible to other orkut members.

If you'd rather receive orkut notifications in your orkut message center, here's how you can adjust your preferences:

1. Click settings on the left sidebar of your profile.
2. Choose the notifications tab.
3. Check the message box for notes you'd like to receive in your orkut message center.
4. Remember to un-check the email box for messages you don't want to receive by email.
5. Click save changes.

Deleted Google Orkut profile still active

Your account will be deleted soon after you choose to delete your orkut profile.

Please do not try to access your profile again, since this action may restore it.

Please contact us via the help forum if you need more help, and include a link to the profile(s) you'd like deleted by following the steps below:

1. Click the Profile button below your profile picture on the left side of your homepage.
2. Highlight and copy (right-click > copy) the address located in your browser's address bar.
3. Paste (right-click > paste) the link into the body of your reply to us.

If you're unable to sign in, you may need to ask a friend to visit your profile and send you this link.

Disabled Google Orkut profile

In most cases, accounts are disabled because of a perceived violation of either the Google Terms of Service or orkut's Community Standards.

Google reserves the right to:

* Suspend a Google Account from using a particular product or the entire Google Accounts system if the Terms of Service or product-specific policies are violated.
* Terminate your account at any time, for any reason, with or without notice.

If your Google Account has been disabled, please review the relevant Terms of Service before attempting to create another account.

Google Orkut - Browser's cookie functionality is turned off

If you see the error message 'Your browser's cookie functionalityis turned off,' this means that you don't have cookies enabled in your browser. To sign in to orkut, you'll need to have cookies enabled.

Learn how to enable cookies in your browser.

Once you enable cookies, you should have no problem signing in to orkut.

Not receiving Google orkut emails

If your email service uses a spam filter, the filter may be blocking orkut notifications such as invitations, email change confirmations, and password assistance emails.

If your filter automatically delivers emails to a bulk folder, please check to see if the orkut emails are there.

Some filters, such as UOL, return emails to the sender instead of delivering them to a bulk folder. If your spam filter does this, you'll need to add noreply-orkut@google.com to your filter's white list. For instructions on how to do this, we suggest consulting your email program's help files or contacting its customer service department.

In addition, some orkut users have reported that they haven't been receiving orkut messages and notifications in their email inboxes. We apologize for the inconvenience this is causing, and we're currently looking into this situation.

Specifically, some orkut users are unable to receive messages or verification emails at yahoo.com.br, Hotmail or MSN addresses. If you're having difficulty receiving email at a particular address, please try an address hosted by a different email

Problems signing in Google Orkut on a Mac

To access orkut on a Mac, please try using Firefox, Netscape, or Safari. It's not possible to access orkut on a Mac using Microsoft Internet Explorer. Mac users who try to sign in with IE may see an error message that tells them to enable their cookies, or they may experience a different error.

Invalid email address on Google Orkut Account

If you provided an invalid email address (or an email address that you can't access anymore) when you created your Google Account and you know the password you defined when you created it, you can make changes to your account. Simply sign in to Google Accounts and click the Edit link located next to 'Personal information.' You can also access your Google Account through your orkut profile by following these steps:

1. Click settings on the left sidebar of your profile.
2. On the general tab, click the link to visit your Google Account Settings. On this page, you'll have the option to change your account email address (username), personal name, nickname, home country, and time zone

Note:
Your new username needs to be a valid email address that isn't currently associated with a Google Account. This is in case we need to send you important verification and notification. Some things to keep in mind:

* If you use your Gmail address as your Google Account username, you won't be able to change it.
* You can't associate your Google Account with an existing Gmail address.

Cookies are enabled in my browser, and I still can't sign in Google Orkut

Cookies are enabled in my browser, and I still can't sign in Google Orkut

If you've verified that cookies are enabled in your browser, please check the date on your computer. Having the wrong date set on your computer can affect the sign-in process. Follow these steps to check the date and time on your computer:

1. Double-click the time in the bottom right corner of your screen.
2. Select today's date and year.
3. After updating the date, please try signing in again in a new browser window.

Also, it's possible that you have other cookie blocking software enabled. Some ISPs, browsers, and security software offer cookie blocking functionality, and other users with similar problems have been able to sign in after disabling this feature.

If you tried these tips with no success, clear your browser's cache. Keep in mind that some older operating systems or browsers are unable to support orkut's sign-in system. You may wish to update or change your browser.

If the problem persists, you may be able to find more troubleshooting tips in your browser's Help files.

When I try to sign in Google Orkut , I see an 'Invalid certificate' error

'Invalid certificate' error

This error often appears when you attempt to sign in using an older operating system or an old version of a browser. If you continue to see this error, you may wish to update or switch your browser.

Google Orkut - 'Please click here to continue.'

When I try to sign in, I see the message 'Please click here to continue.'

This message appears if the browser has the scripting option disabled. To resolve this problem in IE, please follow the steps below:

1. Go to Tools > Internet options.
2. Click the Security tab.
3. Click the default level button.
4. Click OK..

Google Orkut The sign-in box doesn't appear at all

If you don't see the sign-in box at all, you may need to remove www.orkut.com from your list of restricted sites. For IE, please follow these steps:

1. Go to the Tools menu and select Internet Options.
2. Click the Security tab.
3. Click the Restricted Sites red icon in the top section.
4. Click the Sites... button underneath the icon.
5. Select www.orkut.com from the list of websites and click remove.
6. Click OK and OK again.

Google Orkut The sign-in box refreshes when I try to sign in

If you browser's privacy settings are set to high, you may be unable to access orkut. This is because you need to have cookies enabled to sign in to orkut.

To resolve this problem, please add orkut.com to your browser's list of allowed sites. Here are instructions for how to add allowed sites in Microsoft Internet Explorer (IE):

1. Go to the Tools menu and select Internet Options.
2. Click the Privacy tab.
3. Click the Sites... button and type www.orkut.com in the 'Address of Web site' section. (You won't see the Sites... button if you choose 'Block all cookies.')
4. Click Allow.
5. Click OK.

Google Orkut: 'Invalid password' error

As a first step, you can reset your password by clicking I cannot access my account on the orkut sign-in page.

If this doesn't resolve the problem, here are some things you might check:

1. Make sure that Caps Lock isn't enabled on your keyboard.
2. Close and reopen your browser window before attempting to sign in again.
3. Try clearing your browser's cache. To clear your cache in Internet Explorer, go to the Tools menu at the top of the page and select Internet Options. Under the General tab, click Delete Files.
4. If you have the 'Remember me on this computer' feature enabled on the sign-in page, disable it, clear your cache, and sign in again.

Forgotten Google Orkut password

While we aren't able to retrieve or send you your password, you can follow these steps to reset it:

1. Go to the orkut sign-in page.
2. Click the I cannot access my account link.
3. Follow the instructions for submitting your email address. For security purposes, the email address you enter needs to be your primary email address or the email address you use to sign in to orkut.

If you don't use Gmail with your Google Account:

You'll receive a message containing instructions to reset your password at the address registered as your Google Account username.

If you use Gmail with your account:

* If you've signed in or tried to sign in to your account in the past 48 hours, and you have a secondary email address listed in your Google Account, you'll receive a message with instructions to reset your password at that address.
* If you've signed in or tried to sign in to your account in the past 48 hours, but you don't have a valid secondary email address listed on your Google Account, please wait five days before trying to reset your password. After five days, you can reset your password by answering your security question. If your account has been idle for 48 hours, answer your security question, and select a new password.
* If the email account associated with your Google Account is invalid or is no longer accessible, follow the instructions on this help article.

If you can no longer access the email address associated with your Google Account, please file a report . We'll be able to return your account, if we can confirm that you're the owner.

Google Orkut profiles in Google search

Some orkut profiles appear in Google search results as an orkut OneBox. A OneBox is a summary of your orkut profile, including key details like your name, photo and location. A OneBox appears only when someone who is signed in to orkut performs a search on Google.com for friends or friends of friends in their network.

You have the same privacy settings for the OneBox as you do for your full orkut profile, so no information you've made private in orkut will appear in Google search results. Additionally, you can opt-out of the orkut OneBox altogether:

1. On the left sidebar of the orkut homepage, click settings.
2. Click the privacy tab.
3. Under orkut in Google search results, click the radio button next to 'hide information.'
4. Click save changes at the bottom of the page.

Please note: we can't manually select whose profiles will appear in Google search results as a OneBox.

About the Google Orkut search box

The orkut search box allows you to search the entire orkut site. Your searches will include results from other orkut users' profiles, community names, and community topics. To use the search box located in the upper-right corner of any orkut page, simply enter your search terms and press Enter.

The search results will be limited to pages that appear in your selected orkut language. To see results in all languages, click show all languages.

To refine your search results, you can click the appropriate tab to search users, communities, or topics. You can further refine your search in users' profiles by clicking the users tab and then the change filters link.

Google Orkut Apps - Privacy concerns

When you add applications, your public profile information* will be shared through the application with:

* the application developer
* your friends who receive your updates on orkut
* any other viewer or user of the application, whether on orkut.com or another website where the application appears

Note: you can choose to not add an app to your profile or have your friends receive from it, by changing your permission settings. When you add an app, simply uncheck 'Add to my profile' and/or 'Post updates to my friends.' You can also change this setting later by clicking the screwdriver icon in the upper right corner of any app.

*Your public profile information includes any data available on your profile that doesn't have a privacy setting that limits access to friends of friends, friends, or yourself. This includes content such as photos and videos. Your orkut friends' profile names, profile URLs and profile picture (all of which are public profile information) also will be shared.


If you want to report an app for abuse (spam, nudity, or malicious content) click report app at the bottom right of any app. We will review these cases and remove any violating apps, but please note that we will not contact you unless we need further information.

Google Orkut Apps - Finding help

If you'd like to get help using any of the added applications on your orkut profile, you'll need to contact the application developer directly. You can give your feedback to the developers by clicking report app at the bottom right corner of any app, and choosing 'suggestions to developer.'

Although orkut doesm't provide support for specific apps, we do offer help content about adding or deleting apps, and some general information about apps on orkut.

Finding new Google Orkut Apps

Want to know what kind of fun apps are now available on orkut? Browsing applications on orkut is easy, just follow these steps:

1. Go to your orkut homepage or profile page.
2. On the left sidebar, under 'Apps,' click add apps.
3. From here, you can search for apps, browse the most popular apps, apps your friends have added, and the newest apps on orkut. You can also read more about each app and see how other users rate them.
4. Click on an app to learn more about it, and click the Add Application button to add an application to your profile and start using it today!

Removing apps from your Google Orkut profile

You can remove an easily remove an app by clicking the trashcan icon in the upper-right hand corner of any app.

You can also remove an app by following these steps:

1. Go to your orkut homepage or profile page.
2. Click edit on the left sidebar, next to 'Apps.'
3. Click the trashcan icon next to the app you'd like to remove.

If you decide you want an app back, just add it again.

Google Orkut Rearranging the order of my Apps

To rearrange the order of your orkut applications, you can just drag and drop the app icons on your left sidebar into the order you'd like them to appear.

You can also rearrange the order of your orkut apps by following these steps:

1. Go to your orkut homepage or profile page.
2. On the left sidebar, next to 'Apps,' click edit.
3. Use the green arrows next to the app icons to move apps up or down on your list.

Note:
Only your top three icons will appear on your orkut profile page by default. To see all your apps, just click more >> below your top three apps.

Google Orkut - Adding Apps to your orkut profile

Google Orkut - apps to your orkut profile

Adding apps to your orkut profile is easy. Here's how:

1. Go to your orkut homepage or profile page.
2. On the left sidebar, under 'Apps,' click add apps.
3. From here, you can search for apps, browse the most popular apps, apps your friends have added, and the newest apps on orkut. You can also read more about each app and see how other users rate them.
4. If you think you'd like to add an app, click on it for more information. From here just click Add Application on the right side of the page.

Note:
When you add an application it will be added to your profile and your friends will start receiving updates in their activity streams about your activity in that app. If you want to disable either of these features, just uncheck the checkboxes above the Add Application button.

Google Orkut Apps - basics

Google Orkut Apps - basics

Google Orkut Apps are a fun new way to customize your profile by adding games, music, and much more. These apps use your existing orkut connections to allow you to find new ways to have fun and communicate with your friends on orkut.
Although created by third-party developers, apps are integrated into your orkut profile, just like the orkut features you're used to using (like your scrapbook, testimonials, and photos). Our goal is to constantly improve orkut by releasing new features faster.

Google Orkut icons - "About Fans"

Google Orkut "Icons": About fans

If you see a message in orkut that says you have a fan, you can discover the identity of your fan by visiting your homepage and clicking fans next to the star icon.

Then, show your friends that you appreciate them by designating yourself as their fan. Just follow these steps:

1. Click Friends at the top of any page, or click the manage button at the bottom of the 'my friends' section.
2. Find the person you'd like to be a fan of, and click the star to the right of the person's name. The star will change from gray to yellow.

Currently, you can only be a fan of someone you're friends with.

Google Orkut Icons: Hot-list and crush-list

"Icons": Hot-list and crush-list

If another orkut member has caught your eye, here's how you can take action:

1. Take a look at the person's profile.
2. Point the mouse to the more >> link in the left sidebar and select add to hot-list or add to crush-list.

These two lists allow you to flag potential romantic interests. These lists are for your use only, and other members won't know that they've been added, with one exception. If you add someone to your crush-list and that same person adds you, you'll both receive a message indicating that there's a match. The rest is up to you!

Please keep in mind that the add to hot-list, add to crush-list, and send teaser buttons are only visible if a user has filled out the personal section of their profile.

If you have a change of heart about someone on your hot or crush list, you can follow these steps to remove them:

1. Visit your homepage and click lists on the left sidebar.
2. Click the crush-list or hot-list tab.
3. Click delete next to the name of the person you'd like to remove from the list.

Google Orkut - Icons

"Icons": Smiles, hearts, and ice cubes

The smiles, hearts and ice cubes on your orkut profile display the karma that your friends have given you.

Smiles: Trusty

Hearts: Sexy

Ice Cubes: Cool

Use the karma chart to rate your friends as trusty, sexy and cool. Here's how:

1. Click the Friends link in the blue bar at the top of the page.
2. You'll see smiles, hearts, and ice cubes to the right of each friend's name. Click these icons to rate your friends. Make all the changes you want on this page; they'll be saved automatically.

The trusty, cool, and sexy scores are private, so while your friends can see these icons, they won't know who rated them.

If three or more friends have given you karma ratings, you'll see colorful smileys, ice cubes and hearts on your profile page. When you point your mouse to the karma icons, you'll see a percentage; this indicates the average rating you've received from your friends.

Privacy of Google Orkut profile updates

Updates appear only when you make changes to fields in your profile that are visible to your friends. If you update a field with the privacy level set to myself, your friends won't see the change in their 'updates from your friends' section.

Your friends will also be notified if you upload a photo to your album, add a video to your favorites, accept a new testimonial from a friend, or update their status. You'll see notifications of the same changes on your homepage when your friends make updates.

For a quick way to access your own updates section, click the updates button under your profile photo.

Information on my homepage

Order of Updates

The box with updates from your friends shows updates from the past 24 hours in chronological order. The most recent updates are listed first.

Note: It's not currently possible to choose which friends' updates are displayed first, but you can choose to only show updates from certain groups of friends.

Viewing Updates from Certain Friend Groups

You can choose to see updates from only certain groups of friends, here's how:

  1. Click settings on the sidebar of your profile.
  2. Select the general tab.
  3. Select the bubble labeled show updates from groups of my friends.
  4. Select the checkboxes next to the groups of friends you'd like to see updates from.

Viewing All Updates

To quickly access your own updates section, click updates under your profile photo.

Your homepage shows up to 10 updates at a time. Click view more to see additional updates. If you have chosen to only display updates from certain friend groups, at the bottom of the view more page, click view all to see updates from the rest of your friends.

Remember: Your friends can modify their settings at any time to hide all of their updates or any particular update, so you may not be notified of every update.

Basics on Google Orkut 'updates from your friends'

The 'updates from your friends' section on your homepage shows updates when your friends on orkut:

  • make changes to their profile
  • accept new testimonials
  • make changes to their photo albums
  • update their status
  • change their video favorites
You can now comment on photos directly from your activity stream!

Similarly, when you make these changes to your own profile, your friends will see your updates on their homepages. You can control if you want others to see updates you've made.

You can choose to see updates from only certain groups of friends, here's how:

  1. Click settings on the sidebar of your profile.
  2. Select the general tab.
  3. Select the bubble labeled show updates from groups of my friends.
  4. Select the checkboxes next to the groups of friends you'd like to see updates from.
You can now comment on photos directly from your activity stream!

You can also remove the updates section from your profile entirely, just follow these steps:

  1. Click settings on the sidebar of your profile.
  2. Select the general tab.
  3. Select the bubble labeled don't show updates from my friends.
  4. save changes at the bottom of the page.

If you remove your updates section, you'll still be able to access it by clicking the updates button under your profile photo.


Viewing Google Orkut testimonials

You can view testimonials written about you by going to your homepage and clicking the profile button below your photo. Testimonials written about you will appear at the bottom of your profile page.

You can also follow these steps to see a complete list of testimonials written by you and to you:

  1. Select Home at the top of any page.
  2. Click testimonials on the sidebar.
  3. Testimonials you sent are under the 'Testimonials I Wrote' section. To view testimonials other members have written, scroll down to the bottom of the page and click Testimonials My Friends Wrote About Me.

Writing Google Orkut testimonials

To write a testimonial about someone, you need to be in that person's friends network. Once you're friends, follow the steps below:

  1. Visit the person's profile.
  2. Click write testimonial on the sidebar.
  3. Write the testimonial (up to 1024 characters) and click submit.

Your friend needs to accept or decline your testimonial before it shows up in the profile.

As an alternative, you can add a scrapbook entry to an orkut member's profile by clicking scrapbook on the sidebar of their profile. Enter your message in the box and click post scrap.

Your entry will appear in that person's profile instantly.

What is Google Orkut Messages ?

Messages are a private way to communicate on orkut. You can send a message to one of your friends, or if you have something to tell one of your friend groups, you can send out a group message.

Sending a message

To send an orkut message, just follow these steps:

  1. Click messages on the left sidebar of your orkut homepage or profile page.
  2. Go to the compose tab.
  3. Choose if you'd like to send your message to one friend or a friend group and from the drop-down menu choose who you'd like to send the message to.
  4. Enter a subject and write your message, and when you're done, click send.

Deleting a message

Here's how you can delete messages from your orkut inbox:

  1. Visit your profile and click messages on the sidebar.
  2. Select the checkbox to the left of each message you wish to delete. If you want to delete all of the messages displayed on the first page of your inbox, click All.
  3. Select delete selected message(s) from the drop-down menu above the list of messages.

Marking a message as read

To mark messages as read, select the checkbox next to each message written in bold lettering. From the Choose actions... drop-down menu, select mark as read.

Receiving orkut notifications in your orkut message center

If you'd rather receive orkut notifications in your orkut message center, here's how you can adjust your preferences:

  1. Click settings on the left sidebar of your profile.
  2. Choose the notifications tab.
  3. Select the 'message' option for notes you'd like to receive in your orkut message center.
  4. Remember to deselect the email checkbox for messages you don't want to receive by email.
  5. Click save changes.

Why are there sometimes ads in my Google Orkut promotion box?

Orkut Promote is used by both advertisers and orkut users. You can trash or repromote ads in the same way you can do with your friends' promotions.

Who can see my Google Orkut promotions?

When you first create a promotion, only your friends will be able to see it. However, if one of your friends decides they like it enough to promote it themselves, then all of their friends will also be able to see it, and these friends of friends too can share your promotion, and so forth.

Since a promotion can quickly go viral, do not promote anything you aren't comfortable with everyone seeing. Keep in mind, if you decide you no longer want a promotion running for any reason, you can either stop or delete your promotion by going to the my promotions tab.

How do I monitor my promotions in Google Orkut ?


To monitor your promotion, just click promote on your left sidebar, then navigate to the my promotions tab. In this section you'll be able to:

  • Preview your promotion
  • See how many people have clicked, viewed (for videos), or trashed your promotion
  • See who has promoted your promotion
  • Monitor how far your promotion has gone (from friends, to friends of friends, and so forth)
  • Stop or delete your promotion

How do I promote something in Google Orkut

  1. Click promote on the left sidebar of your profile or homepage.
  2. Enter a title and a comment.
  3. Choose if you'd like to add more text, a YouTube video, or one of your public orkut photos.
  4. As you add different elements to your promotion, the preview box will update to reflect your changes.
  5. When you are satisfied with your promotion, click create promotion.

What is orkut Promote?

What is orkut Promote?
  • Orkut Promote lets you and your friends share YouTube videos, photos, or text with each other, so you can easily spread word of a funny video, a cool picture, or an upcoming event.
  • You can reshare your friends promotions, and they can reshare yours, so the information can spread throughout orkut.
  • Once you've promoted something, you can track how many people have seen your promotion, and how many of them have shared it with their friends or trashed it under the my promotions tab.

What is Google Orkut scrapbook?

What is Google Orkut scrapbook?
  • orkut's scrapbook is both a way for you to communicate with others and for you add ore information about yourself.
  • To write a message in anyone's scrapbook (yours or another orkut members'), just visit the scrapbook, enter your message, and click post scrap.
  • If you want to restrict who can write in your scrapbook, just go to your settings page and adjust your privacy settings from there.
he scrapbook feature is another way for you to add tidbits of information to your profile, share a funny story, or reveal a little-known fact about yourself. Click the formatting tips button to learn how to change the color of the text or add a smiley face.

To restrict who can write in your scrapbook, click settings under your profile photo and choose the privacy tab. In the drop-down menu next to 'write in scrapbook,' select all of my friends or friends of friends in my network. If you select everyone, anybody in your designated network is allowed to write in your scrapbook.

You can also add messages to other members' scrapbooks. Just visit their profile and click view scrapbook. Enter your message in the box and click post scrap. Your entry will appear in their profile instantly. If you change your mind about what you've written, you can always return to their scrapbook and click delete next to your scrap.

Notes:

Some users only allow all of their friends or friends of friends in their network to write them a scrap. In this case, you'll need to add them as a friend or send a message instead. Use the reply scrap link to respond from within your own scrapbook. Anyone you've sent a scrap to in the past will be able to reply to your scrap, regardless of the new privacy settings.

Google Orkut - Watching friends' videos

To watch a friend's video in orkut, visit your friend's profile and click the videos button. You can watch a video by clicking either the title link or the play button on the video thumbnail.

To watch a friend's video directly from the host website, click the YouTube link that appears next to the title of the video on their favorite videos section.

Google Orkut - Adding videos to orkut

To add video links to your profile, just follow these steps:

  1. From your homepage, click videos on the sidebar.
  2. In the 'Video URL' field, enter the URL for the video you want to add from YouTube.
  3. Click the add video button. You'll see a confirmation message that your video has been added to your favorites.

You can also add videos to your orkut profile directly from YouTube, here's how:

  1. When you find a YouTube video you'd like to add to your orkut profile, click the Share button below the video.
  2. Click the orkut button.
  3. You'll be taken to your 'add favorite videos' page (if you aren't already signed in to orkut, you'll first be prompted to sign-in to your orkut profile.)
  4. Click the add video button. You'll see a confirmation message that your video has been added to your favorites.

Note: At this time, you can add up to 250 video links.

Google Orkut: Photos and videos Editing photo captions

Here's how you can edit your photo captions:

  1. Click photos on the left sidebar of your profile.
  2. In the Albums section, click the album you want to edit.
  3. Click edit below any photo to change the caption.
  4. Edit the caption and click update.

You can also edit captions as you browse through your albums, by clicking the edit button below any of your photos.

It's easy to edit the captions of multiple photos quickly. Here's how:

  1. Click photos on the left sidebar of your profile.
  2. In the Albums section, select the album you'd like edit.
  3. Click the edit all photos button below the album name. From this page you'll be able to edit your captions.
  4. When you're done editing the album, don't forget to click save changes at the bottom of the page.

Learn basics - Orkut photo albums

orkut has upgraded your photo experience: now you can add thousands of photos and you can easily organize them into different albums. To create a new album, follow these steps:

  1. Click photos on the left sidebar of your profile.
  2. Click Create new album and enter an album title and an optional description.
  3. Click create.

Your new album will immediately appear in the Albums section below. Now you're ready to start adding photos to it! To do so, follow these steps:

  1. In the Albums section, click the album you want to add photos to.
  2. Click add photos and select your photos.
  3. Click upload photo.

Within an album, your photos are automatically displayed from oldest to newest. You can rearrange your photos by following these steps:

  1. Click photos on the left sidebar of your profile.
  2. In the Albums section, click the album you'd like to reorder.
  3. Click reorder photos below the album title.
  4. Drag the photos into the desired order.
  5. Click save changes.


Tuesday, September 22, 2009

Google Docs - Getting started guide

Signing up a Google doc

With Google documents, you can easily create, share, and edit documents online. Here are a few specific things you can do:

  • Microsoft Word, OpenOffice, RTF, HTML or plain text documents, create documents from scratch, and download your online ones.
  • documents online simultaneously with anyone you choose, and invite others to view them.
  • track of who made changes to a document and when, and roll back to any version.
  • documents online to the world, as webpages or post documents to your blog.
  • your documents out as attachments.
Read this guide to familiarize yourself with the main features of Google documents and get started creating your own.


Creating and saving a Google doc

There are different ways of getting started using Google documents: you can create a new online document, you can upload an existing one, or you can use a template from our templates gallery.
Creating and saving a document

To create a new document, go to your Docs list, click the New drop-down menu, and select Document.

As you're working on your document, click the Save button in the top right corner of the document, enter a name for the document in the window that appears, and click OK. Then, you'll see your document in your Docs list.

If you'd like to save and close a document, click the Save & close button.

To save a local copy of a document, you can download it to your computer. To do this, open your document, click the File menu and point your mouse to the Download file as option. You'll see these file types: HTML, RTF, Word, Open Office, PDF, and plain text. Select a file type and click OK in the browser window that appears.
Uploading a document

You can upload existing documents to Google documents at any time.
Here's how:
a. Click the Upload button at the top of the sidebar in your Docs list page.
b. Click Browse and select the document.
c. Click Open.
d. Click Upload File. The uploaded file appears in your Docs list.


Using the templates gallery of a Google doc
If you want to quickly create a document, you can pick one of the templates in our templates gallery. Each template has standard text that you can replace with your own, and preset formatting that you can reuse. Learn more in the templates gallery section of our help center.

You can also access the templates gallery from your document by going to
File > New > From template...


Editing a Google doc


You can change the font or the text size in your document from the toolbar or the 'Document styles' window. To change the spacing of the document, you'll need to open the 'Document styles' window.

From the Google Documents toolbar

To change the font or the text size quickly, select the text you'd like to change and click either the font menu, which lists Verdana, or the text-size drop-down menu, set to 10pt by default. Choose a new font or text size, and the changes are applied to the selected text.

From the 'Document styles' window
Click the Edit drop-down menu and select Document styles. A window appears.

  • Here's what you can do from this window:
  • Change the font and text size from the drop-down menus.
  • Change the spacing in between lines by selecting an option from the Line-space drop-down menu.
  • Preview your changes within the window.
  • Apply these changes to all your new documents.


Inserting images in a Google Doc

You can enhance your document by inserting an image. Here's how:

1. Click the Insert drop-down menu from the toolbar and select Image.
2. Select 'From this computer' or 'From the web.'
3. Depending on what radio button you selected, choose an image file from your computer, or enter a URL and preview the image.

To specify the size of your image and where it appears in the document, click More image options.


Adding comments in a Google Doc


Comments are a handy way of adding notes to your regular document text and are visible to viewers and collaborators. These can be invaluable for communicating with collaborators about specific parts of the document, as well as making notes about changes you've made or would like to make. When you publish your document as a webpage, post it to your blog, or print it, the comments will disappear.

To add a comment to your document, follow these instructions:

1. Place your cursor where you'd like your comment to appear.
2. Click the Insert drop-down menu.
3. Select the Comment icon.
4. Type your comment in the comment field. Each comment is automatically stamped with your username and the date.
5. To print your comments,go to Print settings in the File menu and you'll see a box called Include comments. This box will be checked by default.

A useful tip: If you'd like a shortcut, you can also use the keyboard shortcut, Ctrl + M (Cmd + M for Mac), to insert a comment.

To delete a comment, simply click on it and choose Delete comment from the menu.


Inserting links in a Google Doc


If you want to insert a link to a website or an online document as a reference, follow these steps:

1. Place the cursor where you'd like the link to appear in your document.
2. Click the Link icon from the toolbar, and a window appears.
3. Select 'URL' at the top of the window.
4. Enter the URL.
5. Click Insert Link. The inserted URL will now be visible in your document.

You can also hide the actual URL but still link to the website from specific text in the document. For example, you could choose to link to www.google.com from the words 'search here.' If someone clicks 'search here,' www.google.com opens automatically. To insert a link within text, simply type the text into the first text box in the Link Display section.


Sharing your Google doc

Now that you've created your Google document, you can share it with your friends, family, or coworkers. You can do this from your Docs list or directly from the document.

  • From the Docs list, select the checkbox next to the document you want to share (you can also select multiple documents), and click the Share drop-down menu in the toolbar.
  • From your document, click the Share drop-down menu in the top right corner of the page.

Then follow these instructions:

1. Select Invite people…
2. Select To edit or To view, depending on your preference.
3. Enter the email addresses or mailing lists that you'd like to add.
4. If you'd like to add a message to your invitation, enter some text and click Send. To skip sending an invitation, click Add without sending invitation. Your collaborators and viewers will still be able to access the document from their Docs lists, but won't receive an email invitation.

In the Share dialog, you can also check who has access to your document, remove collaborators and viewers, and change editing rights.

Note: * You can explicitly share your document with up to 200 combined viewers and collaborators; however, if you publish your document, anyone will be able to access it. * Up to 10 people may simultaneously edit and/or view a document.


Collaborating a Google Doc


While you and your collaborators are editing a document, you can keep track of changes (and of the person who made them), and even revert to an older version by using 'Revision history.' From your document, select the Tools drop-down menu and click Revision history.

On the next page, you'll see a list of the revisions, the date and time each was last edited, and the changes made. You can also compare two revisions at a time.

If you change your mind about the most recent edits you or your collaborators made to the document, simply revert to an older version. Here's how:

1. Click any revision from the list you see. If you select the wrong one, you can click Older or Newer until you find the version you want.
2. Click Revert to this one on the right side of the page.

Your document is reset to the version you selected. When your collaborators view this file, they'll see the version you selected.

Note: If you want to go back to the latest version of your document, open 'Revision history' and click Newer until you get to the latest version.